
Diy Outdoor Vent Hood DIYQI
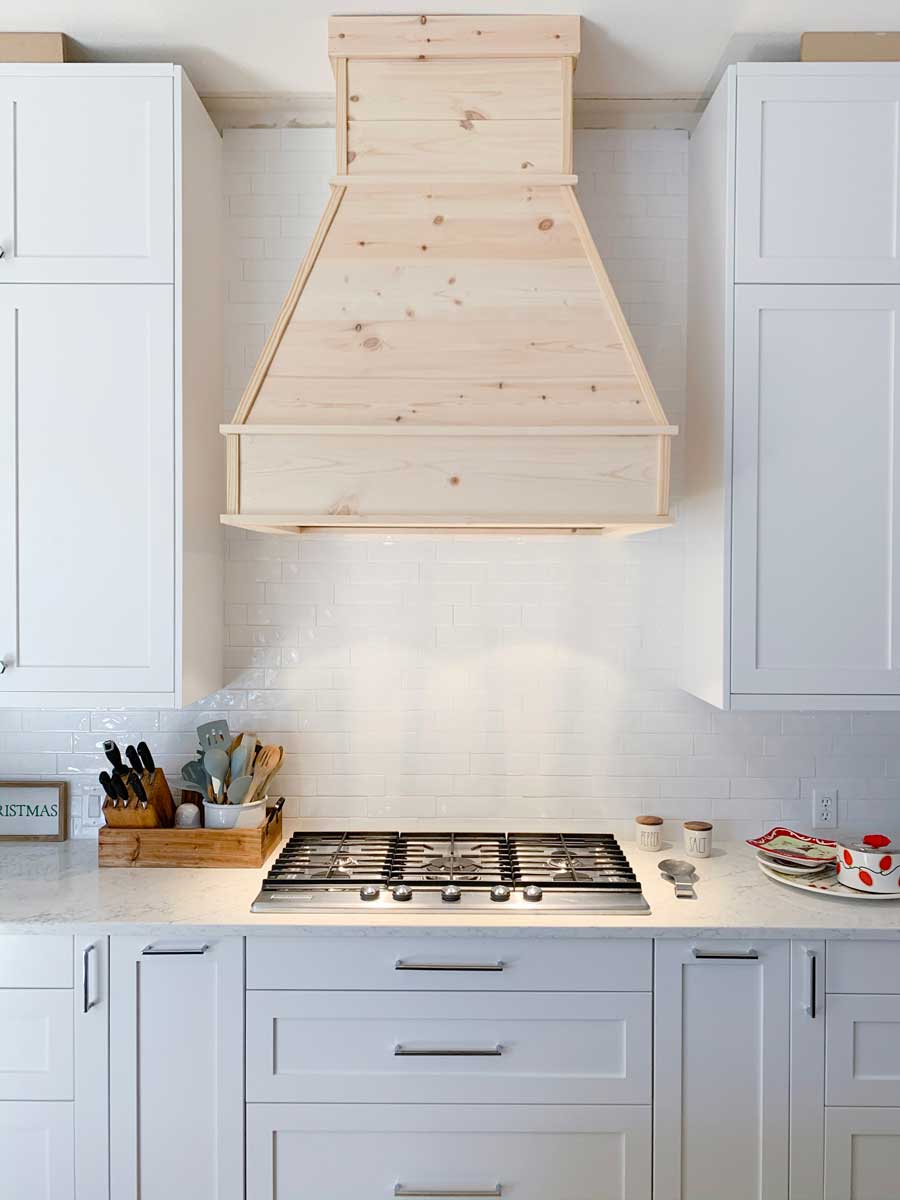
1″ x 8″ clear pine Measure and Calculate Angles The first thing you need to do is determine the size of your hood, and this will all depend on your kitchen setup and how you plan on mounting it. I needed the hood to be big enough to cover the existing stainless hood and wide enough to touch each upper cabinet.

Famous Diy Vent Hood Plans References Heavy Wiring
In this video, I build a custom range hood cover and structure for my recently remodeled kitchen. This hood cover is made from black walnut and holds a range.
DIY custom straightsided vent hood with Zephyr insert / Create / Enjoy
DIY kitchen vent hood in 6 simple steps By Korilyn Martin 09/16/2022 10/03/2022 Today, I'll be sharing how we DIYed our Kitchen vent hood for our new kitchen remodel. Cooking can be a messy business, and if you're not careful, the smoke and fumes from your stovetop will damage your kitchen over time.
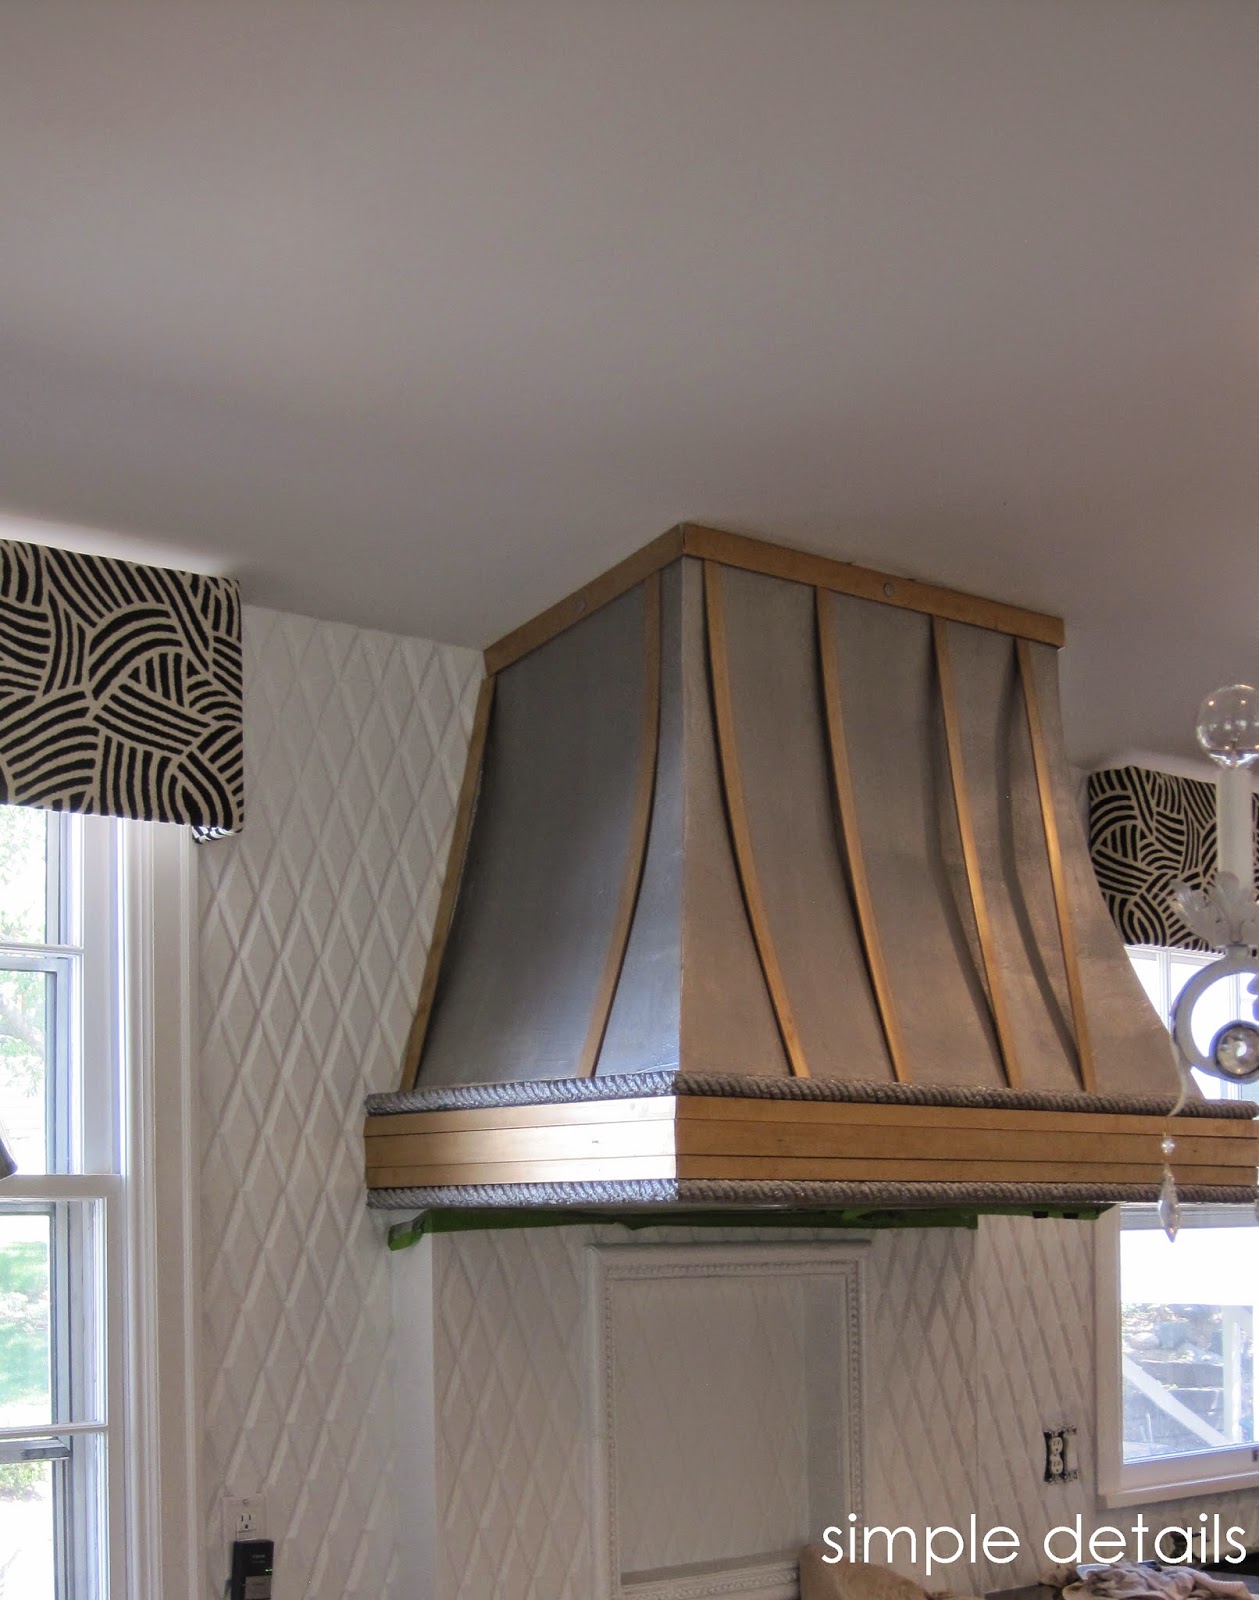
Simple Details diy metal range hood...
Jigsaw Palm Sander Screw Driver & Drill 1″ Spade Bit 6″ Ducting Ducting Tape Ducting Transition (Fit to your vent insert) Clamps 3″ Screws 18 Gauge Brad Nailer 1″ Brad Nails Level Tape Measure Spackling Sanding Block Paint (We used Super White by Benjamin Moore in eggshell) Skinny Foam Roller Paint Brush Painters Tape

Diy Wood Hood Vent Cover Plans Zoya diys
DIY Vent Hood. by Lauren Jamison | DIY + Design. 10 Materials. $120. 8 Hours. Medium. When I first came up with the design for our kitchen, I envisioned a black range hood chimney.which we installed originally. What I hadn't taken account for was our 10 foot ceilings and the issue of the chimney being too short to reach to the ceiling.

unfinished wood vent hood cover Roselyn Jeffery
I made the front of the 1×2 flush with the surface of the vent hood cover. Now to pretty it up! I attached 2 3/4″ casing to the bottom and top of the mantel. This will cover the ugly nail holes from attaching the bottom piece of the mantel. I attached the casing with 3/4″ brad nails and my brad nailer.
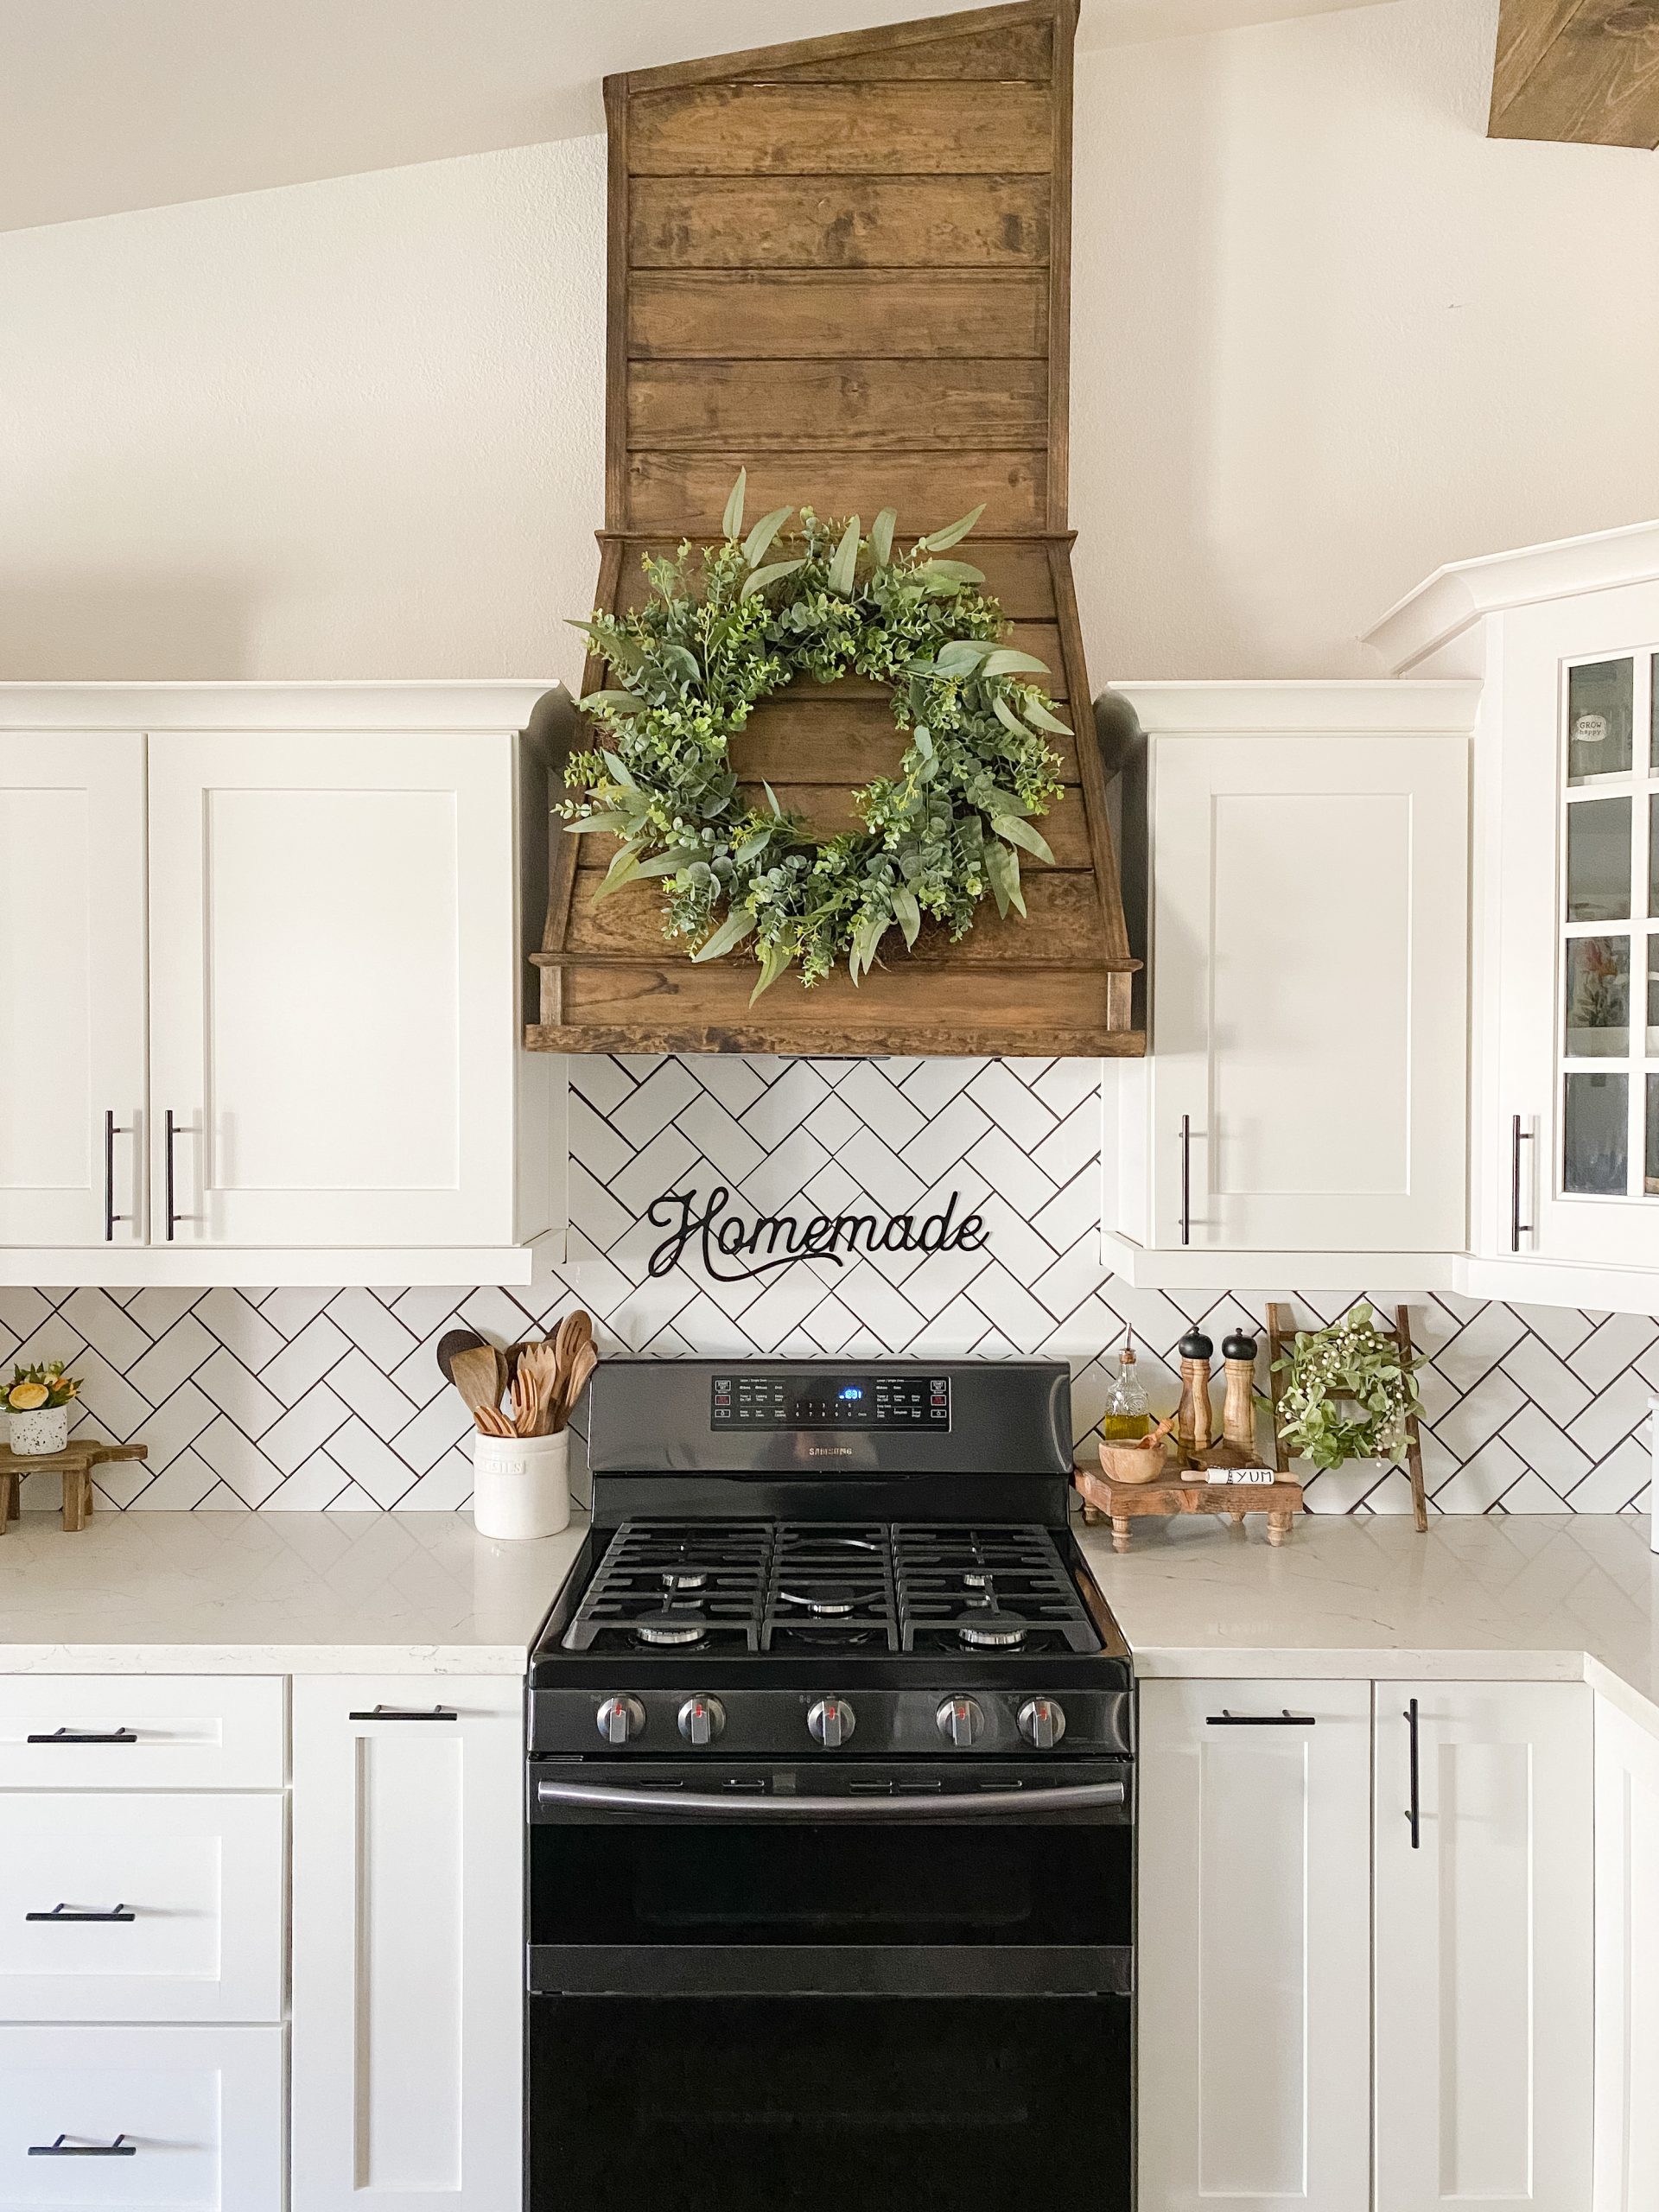
How To DIY A Modern Farmhouse Wood Vent Hood
How to Build a Custom Vent Hood or Range Hood This post contains affiliate links: Read and learn about our policy here. Tools Required: Pocket hole jig Drill Chop Saw Table saw Sand Paper Clamps optional: orbital sander Supplies Required

Remodelaholic How to Build a Farmhouse Style Custom Wood Vent Hood
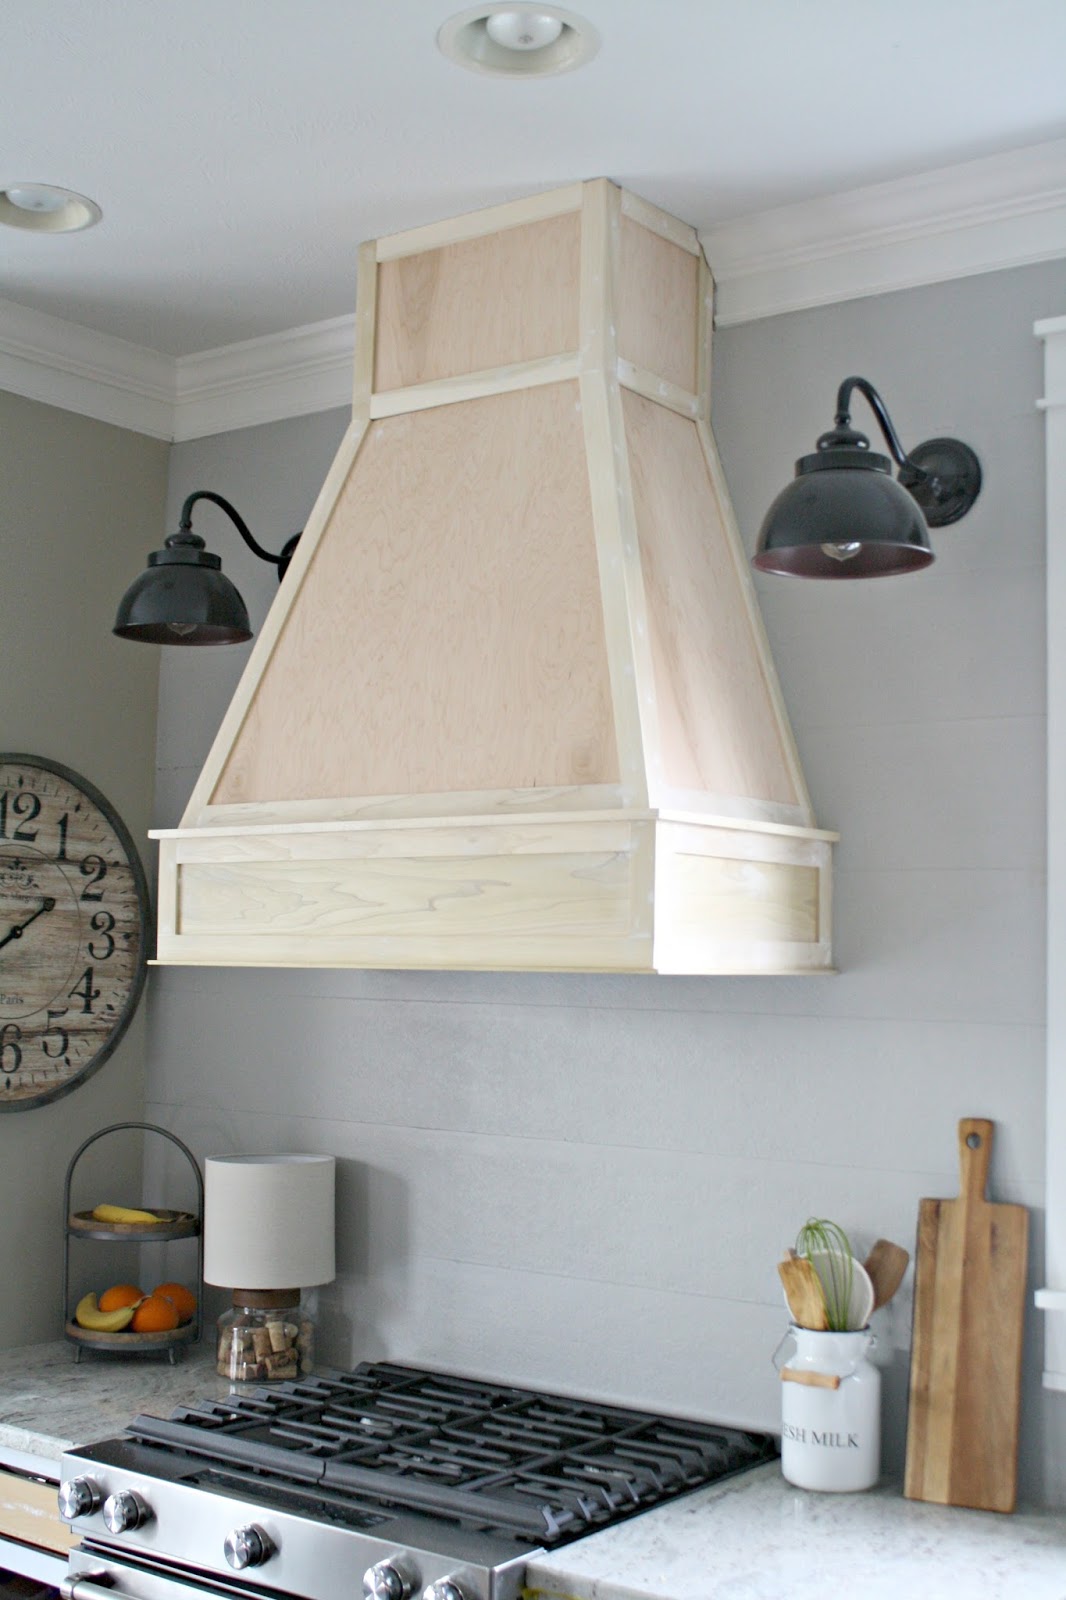
8. Install 1×2 on the back top of the front of the frame. 9. Install 1×4 on sides and 1×6 in the middle. Boards need to be the length of the top of the cabinet to the inside of the frame. 10. Use birch plywood for the face and the sides of your range hood cover. 11.

DIY Rustic Vent Hood Cover Rough Around the Edges
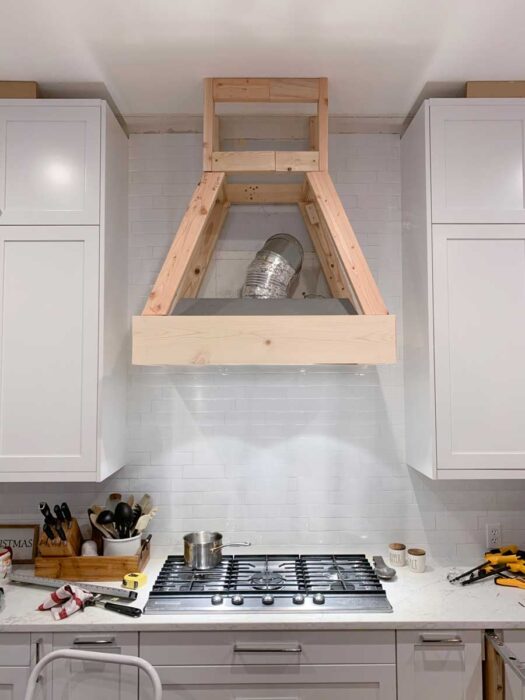
In the packaging, the liner came with screws to attach to the plywood box on the sides and then the exhaust fan insert came with screws to attach to the liner. We mounted it flush to the bottom of the plywood and then trimmed it out with 1×2 pine to make it look seamless. (pictures below)

diy vent hood duct Merry Ejournal Stills Gallery
21.5K A vent hood in the kitchen is for function, but there is no reason it can't also be a work of art since it is usually the focal point of the main wall! This DIY vent hood for the kitchen is just that, a beautiful focal point to really enhance the overall look of your space! Customize it with paint or stain to match your kitchen!

DIY Modern Farmhouse Vent Hood and Tool Giveaway!
Looking For Kitchen Hood Vent? We Have Almost Everything On eBay. But Did You Check eBay? Check Out Kitchen Hood Vent On eBay.
A DIY(ish) Wood Vent Hood from Thrifty Decor Chick
Fill any nail holes with wood putty and let dry. Sand all surfaces and wipe clean with a tack cloth. Paint with a paintbrush and let dry. Once dry, use a drill to attach the box to the cabinet opening. We recommend painting cabinetry and trim with oil-based paint. It has a hard finish that holds up to heavy use.
How I Built My DIY Farmhouse Vent Hood Cover
It just takes a little bit of research. How to: He first started making the frame. In order to have a seamless edge he mitered this base at a 45° angle then using a nail gun secured the base together. Make sure you also use wood glue. Glue is 10X more stronger than the nails. This in insure it never comes apart.
A DIY(ish) Wood Vent Hood from Thrifty Decor Chick
In order to have a seamless edge he mitered this base at a 45° angle then using a nail gun secured the base together. Make sure you also use wood glue. Glue is 10X more stronger than the nails. This in insure it never comes apart. So this is the tricky part. In the picture below the hood is halfway built.
How I Built My DIY Farmhouse Vent Hood Cover
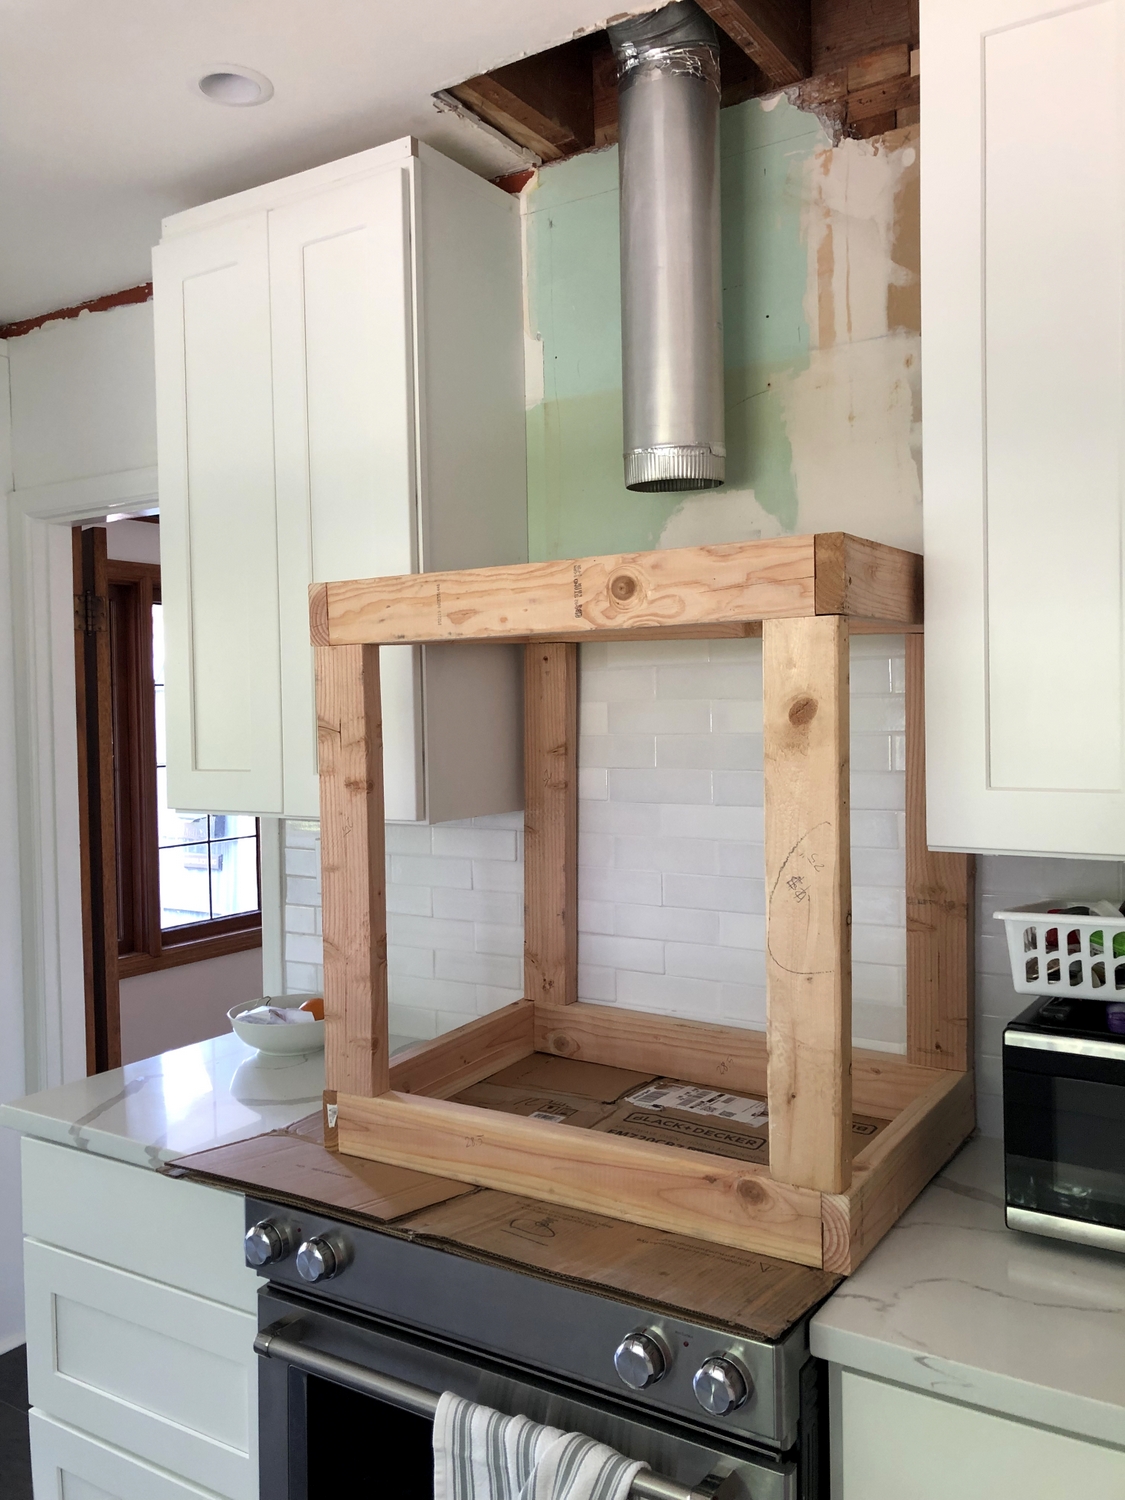
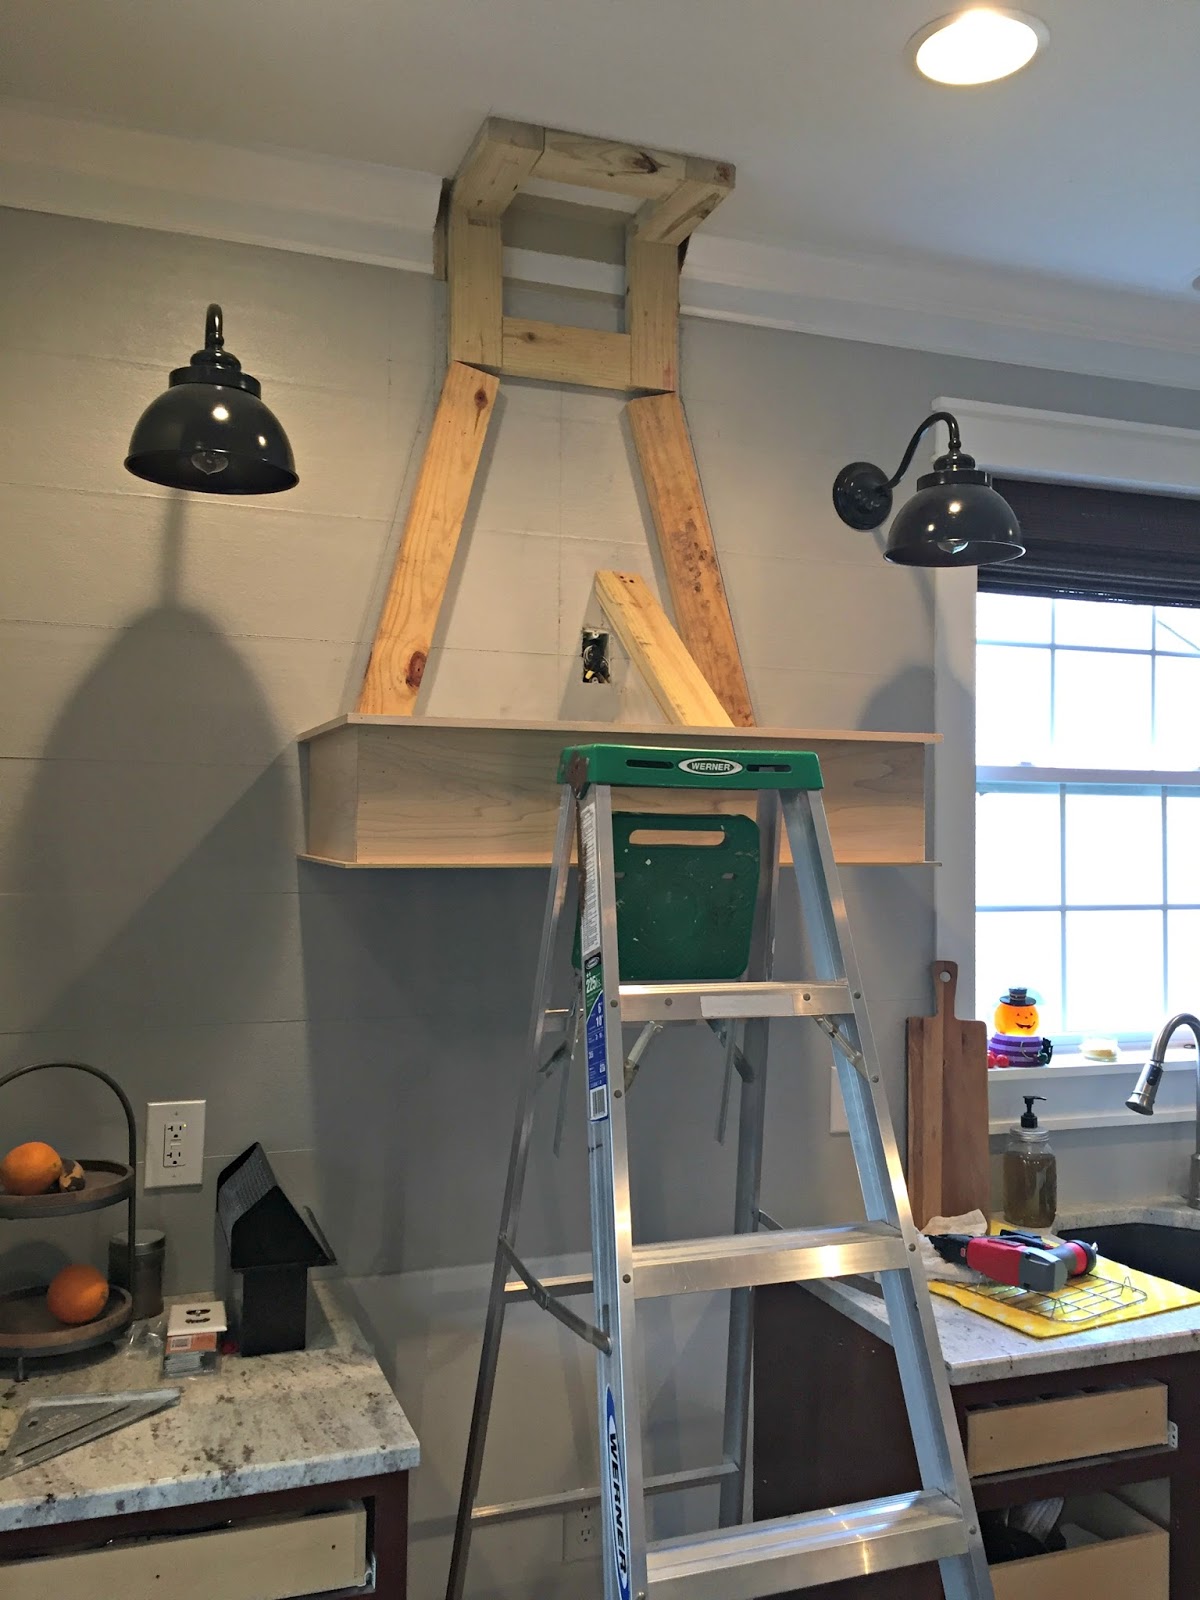
Cut a 1″ x 4″ to fit across the front of the hood. Miter the corners. Attach the front of the support frame with glue and small cabinet screws. (Pre-drilling holes for the screws is a good idea.) Measure and cut a 2″ x 4″ to fit between the cabinets. This will be blocking and support for the range hood face frame.

DIY Decorative Hood Range Vent
Cut two support beams to this width. Next, cut two support beams to the overall length you decided on for the range hood (for me it was 16 inches). Attach the supports together, creating a box frame. Do this outside of the cabinet space (in your workshop). Next, cut a 3/4 inch thick piece of plywood to the overall width and length of the.
